
- Home
- /
- Article

Wall Mount Kit Installation Guide for Cisco Desk Phone 9800 Series
 In this article
Follow the information as follows to mount your Cisco Desk Phone 9800 Series to a wall.
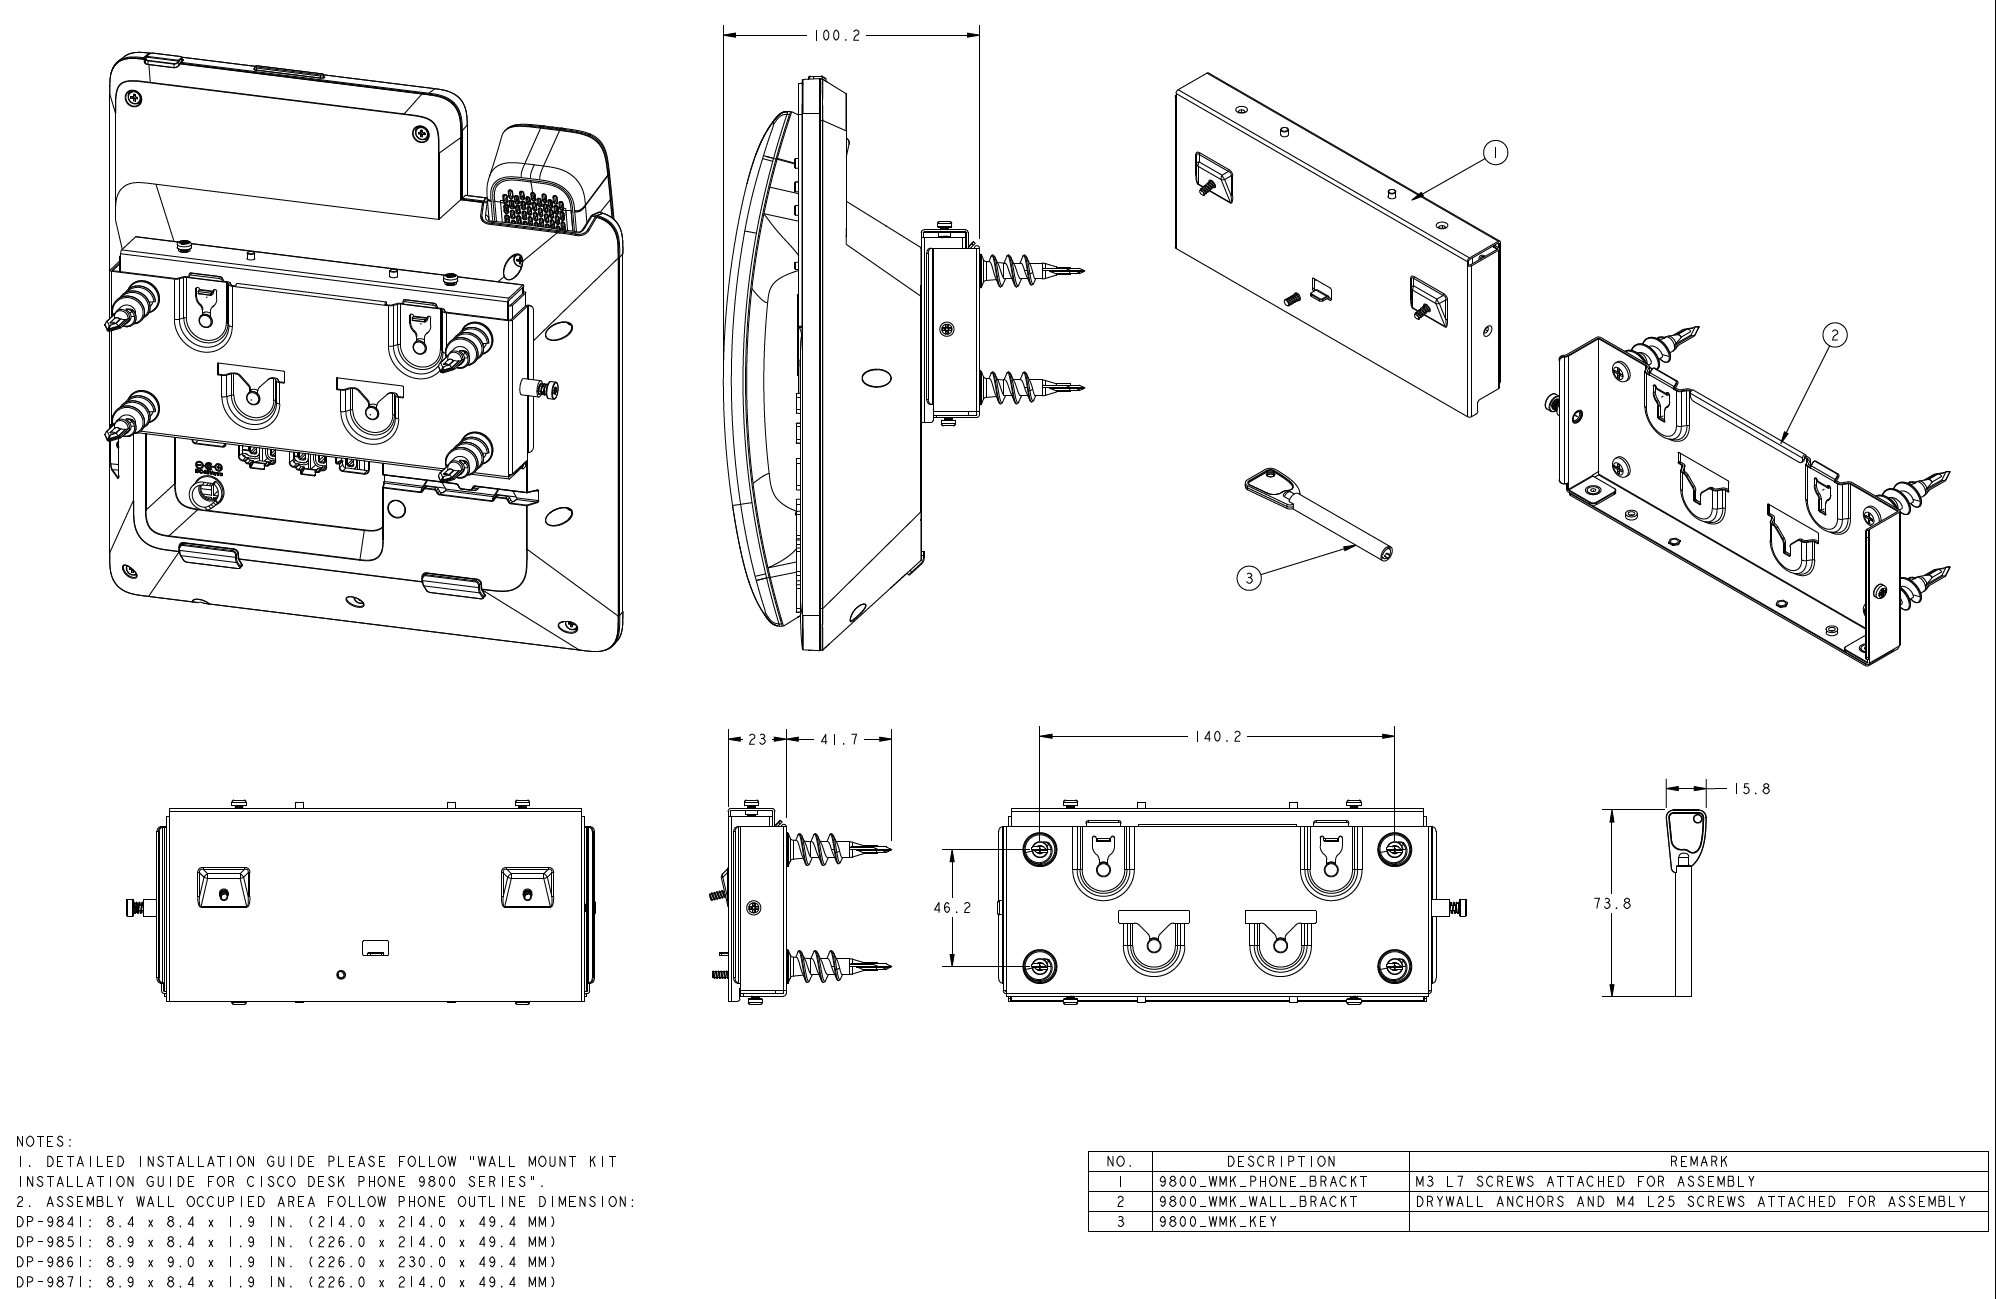
Install the Wall Mount Kit for your phone
The wall mount kit can be mounted on most surfaces, including concrete, brick, and similar hard surfaces.
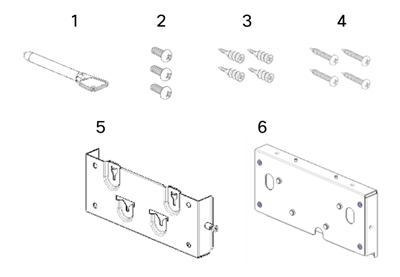
The package contains the following items:
-
One WMK key
-
Three M3 L7 screws
-
Four drywall anchors
-
Four M4 L25 screws
-
One wall bracket
-
One phone bracket
Before you begin
-
Ensure enough space on the wall is preserved for the WMK and phone assembly. See the detailed dimensions on the technical drawing.
-
You need these tools to install the bracket:
-
#1 and #2 Phillips-head screwdrivers
-
Level
-
Pencil
-
-
If you want to use the phone with a wired network, you must also install an Ethernet jack for the telephone in the desired location. This jack must be wired appropriately for an Ethernet connection. You can't use a regular telephone jack.
-
If you want to use the phone with a wireless network, ensure you choose a location close to a power outlet.
| 1 |
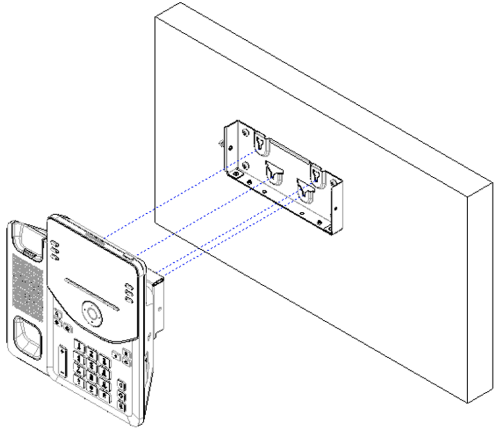
Mount the wall bracket in the desired location.  |
| 2 |
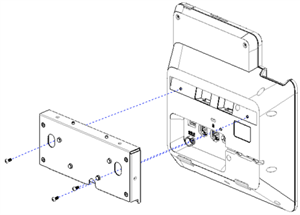
Attach the phone bracket to the phone. Unplug the cords from the phone if any cords are attached.
|
| 3 |
Attach the cables to the phone: |
| 4 |
Attach the phone bracket assembly to the wall bracket.
|
| 5 |
Use the WMK key to lock the device assembly with the wall brackets on both sides. 
|
What to do next
Adjust the handset rest if the handset easily slips out of the cradle.
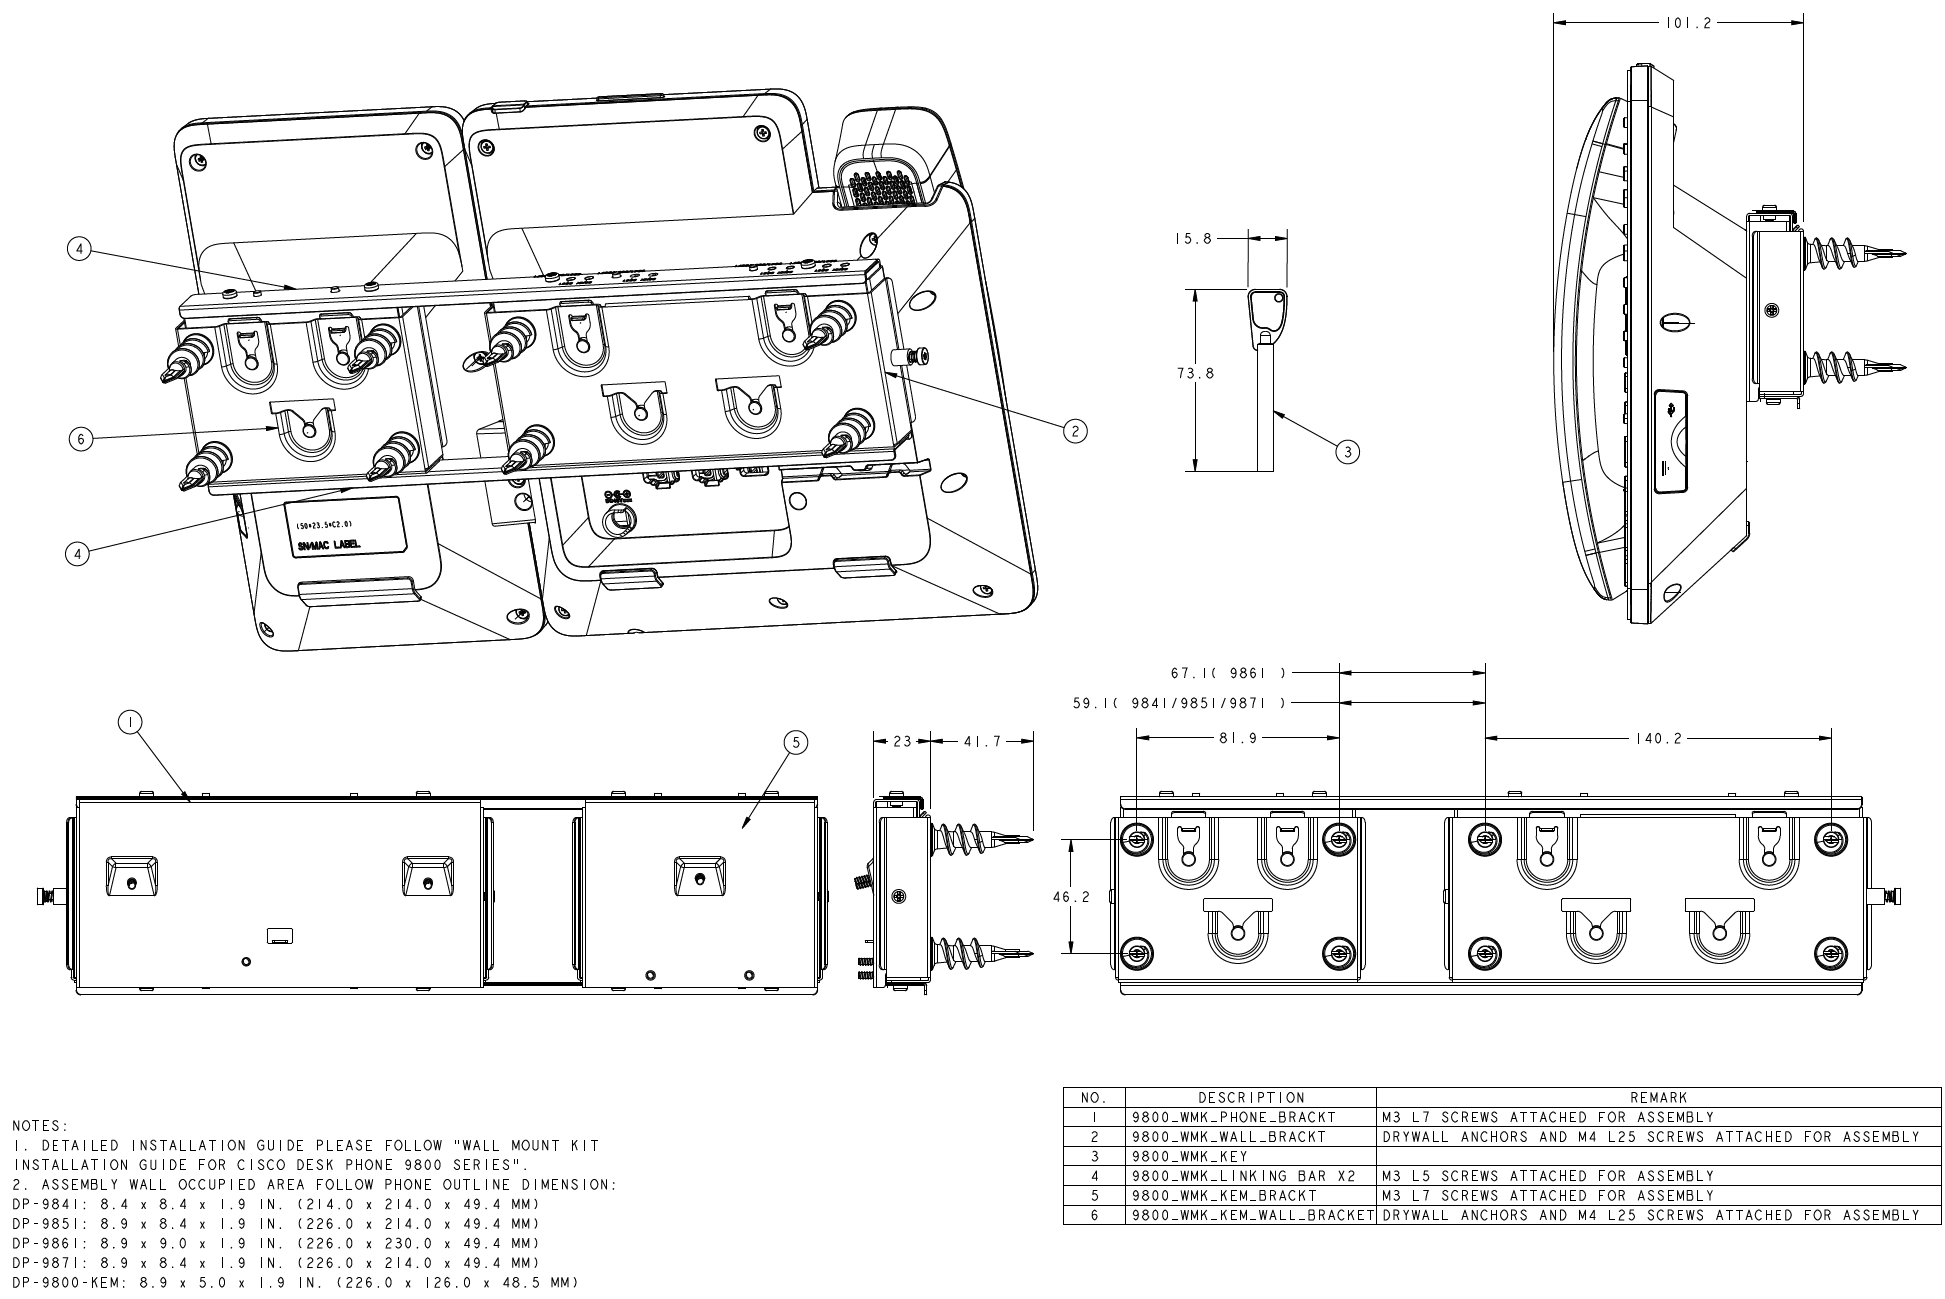
Install the Wall Mount Kit for your phone and Key Expansion Module (KEM)
The wall mount kit can be mounted on most surfaces, including concrete, brick, and similar hard surfaces.
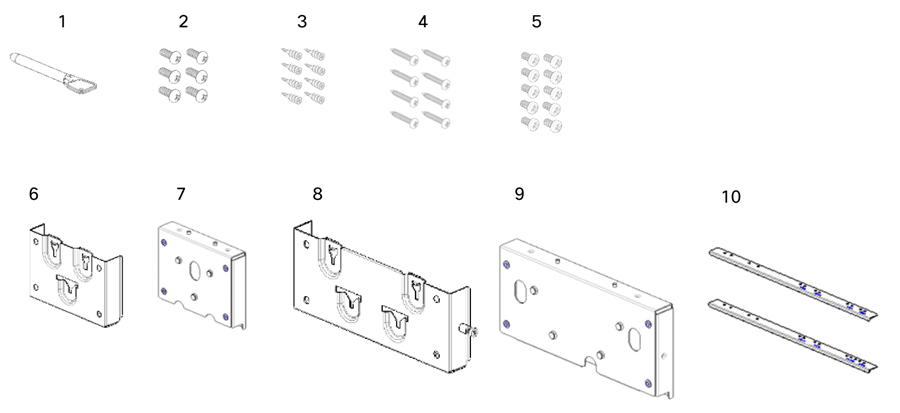
The package contains the following items:
-
One WMK key
-
Six M3 L7 screws
-
Eight M4 L25 screws
-
Eight drywall anchors
-
Ten M3 L5 screws
-
One wall bracket for KEM
-
One KEM bracket
-
One wall bracket for phone
-
One phone bracket
-
Two linking bars
Before you begin
-
Ensure enough space on the wall is preserved for the WMK and phone assembly. See the detailed dimensions on the technical drawing.
-
You need these tools to install the bracket:
-
#1 and #2 Phillips-head screwdrivers
-
Level
-
Pencil
-
-
If you want to use the phone with a wired network, you must also install an Ethernet jack for the telephone in the desired location. This jack must be wired appropriately for an Ethernet connection. You can't use a regular telephone jack.
-
If you want to use the phone with a wireless network, ensure you choose a location close to a power outlet.
| 1 |
Assemble the two wall brackets with a linking bar with the included M3 L5 screws. Due to variations in phone dimensions, the linking bar offers multiple holes to accommodate different models. Select the holes that match your phone model. 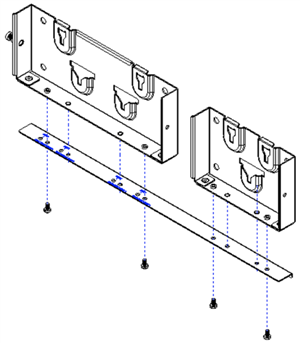 |
| 2 |
Mount the wall bracket assembly in the desired location. 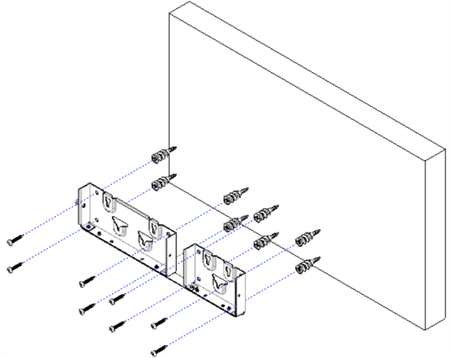 |
| 3 |
Assemble the phone bracket and the KEM bracket with the other linking bar using the included M3 L5 screws. 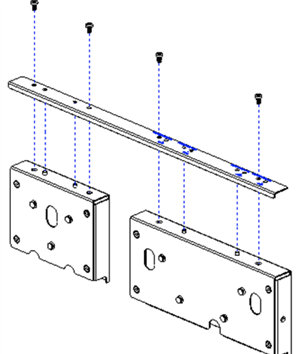 |
| 4 |
Connect KEM to the phone. |
| 5 |
Attach the bracket assembly to the phone and KEM assembly . Secure the phone bracket to the phone with the included M3 L7 screws, using a #1 Phillips-head screwdriver. 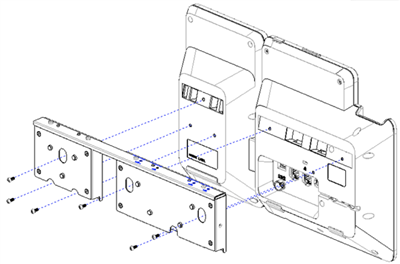
|
| 6 |
Attach the cables to the phone: |
| 7 |
Attache the phone and KEM assembly to the wall brackets. 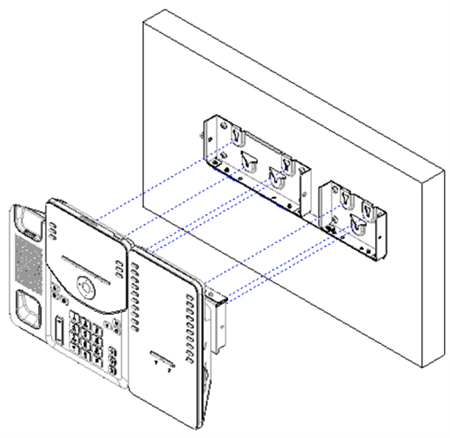
|
| 8 |
Use the WMK key to secure the device assembly with the wall brackets on both sides. 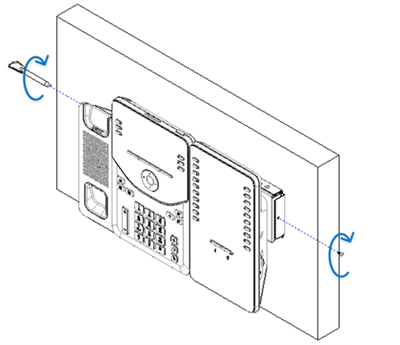
|
What to do next
Adjust the handset rest if the handset easily slips out of the cradle.
Adjust the handset rest
If your phone is wall-mounted or if the handset slips out of the cradle too easily, you may need to adjust the handset rest to ensure that the receiver does not slip out of the cradle.
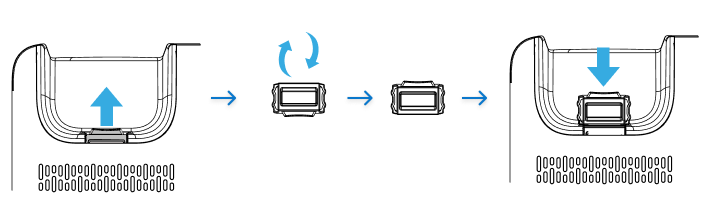
| 1 |
Remove the handset from the cradle and pull the plastic tab from the handset rest. |
| 2 |
Rotate the tab 180 degrees. |
| 3 |
Insert the tab evenly into the slot. An extension protrudes from the top of the rotated tab.
|
| 4 |
Return the handset to the handset rest. |
Remove your phone from the wall mount
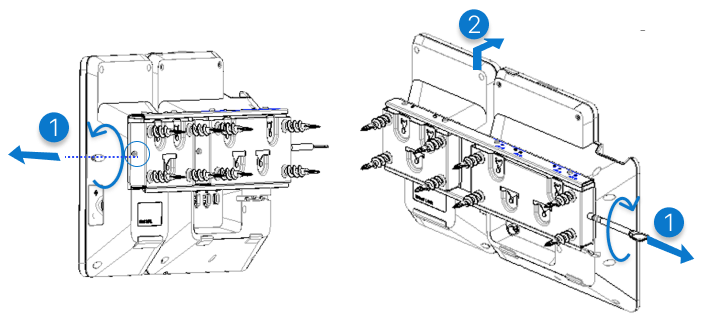
| 1 |
With the WMK key, remove the screws on both sides of the phone bracket or the KEM bracket. |
| 2 |
Lift the phone assembly to release it from the wall bracket, and then pull it toward yourself. |
WMK adapter
The Wall Mount Kit (WMK) adapter offers a quick and convenient solution for users upgrading from the Cisco IP Phone 8800 series to the Cisco Desk Phone 9800 Series. If you already have a wall mount setup for the 8800 series, there's no need to uninstall or replace the entire kit. Instead, you can use the WMK adapter to securely mount a 9800 series phone onto the existing 8800 series wall bracket.
The adapter package contains the following items:
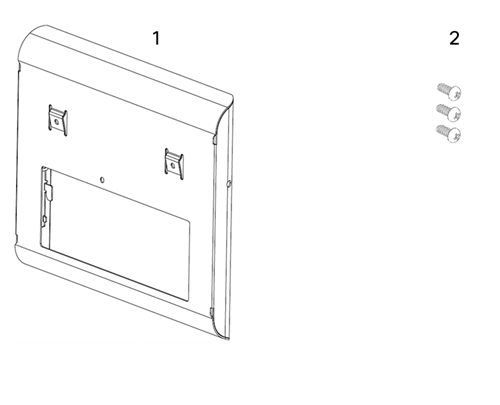
- One WMK Adapter
- Three M3 L5 screws
Follow these steps to install your 9800 series phone using the existing 8800 series wall mount bracket:
| 1 |
Plug the handset cable into the Handset port on the back of the 9800 series phone and secure the cable into the cable notch. |
| 2 |
Attach the WMK Adapter to the back of the phone and fasten it with the three provided screws. 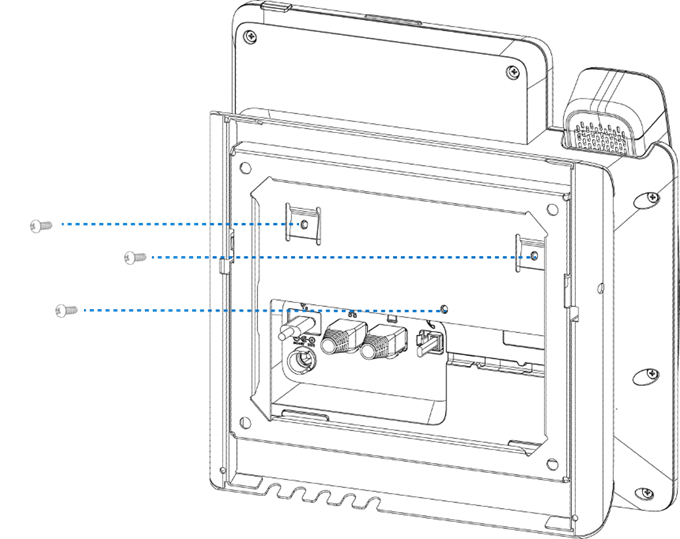
|
| 3 |
Plug in the Ethernet cable and the power cord. |
| 4 |
Attach the phone to the 8800 series wall bracket by inserting the tabs on the top of the wall bracket into the slots on the adapter. For cables that don't terminate behind the wall, route them through the cable-access openings at the bottom of the wall bracket. These openings are designed to accommodate the power cord and any other external cables. When aligned, the openings on the adapter and the wall bracket form circular passthroughs, each sized to fit one cable per opening. |
| 5 |
Firmly press the phone into the wall bracket, then slide it downward until the bracket tabs click into place. |
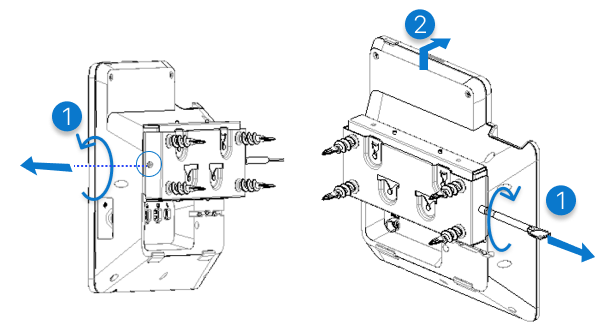
Remove the phone from the wall
The wall bracket has two tabs that lock the adapter. These tabs must be released before you can remove the phone from the wall mount kit.
Before you begin
Obtain two Phillips head screwdrivers or other similar devices that have a diameter of 5 millimeters or 3/16 inch.
| 1 |
Insert a screwdriver into the holes on the left and right sides of the wall bracket, then press firmly inward to disengage the tabs. |
| 2 |
Lift the phone to release it from the wall bracket, then pull it toward you. 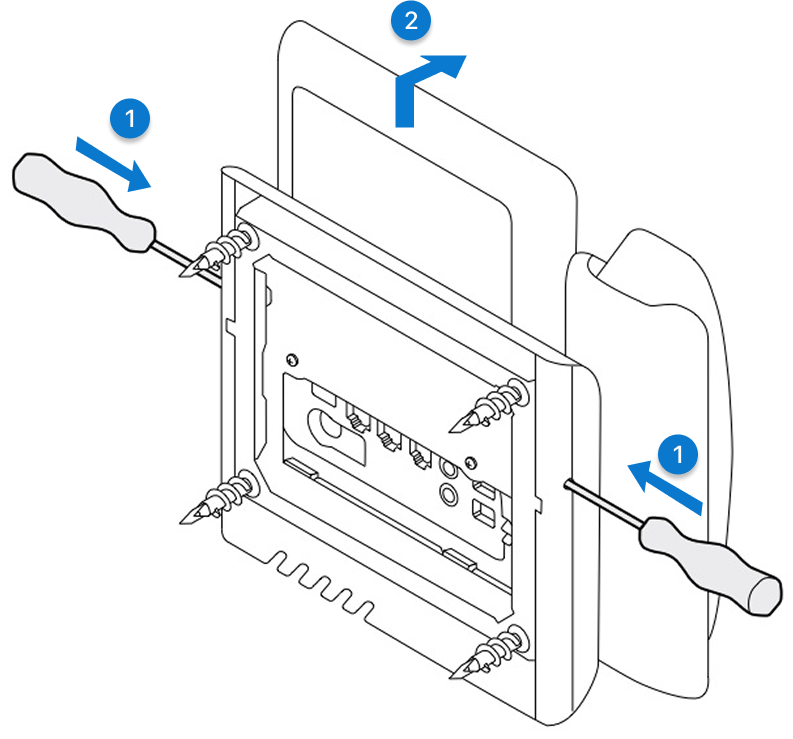
|


